Article Contents
Overview
Squarespace is a service that can be used with your domain name. If configured properly, you can still use your hosting with us for other services including email. This KB article will walk you through configuring your domain and hosting to work with Squarespace and still allow for using other services and features.
cPanel Configuration
- Login to your cPanel account
- Pull up the "Advanced Zone Editor"

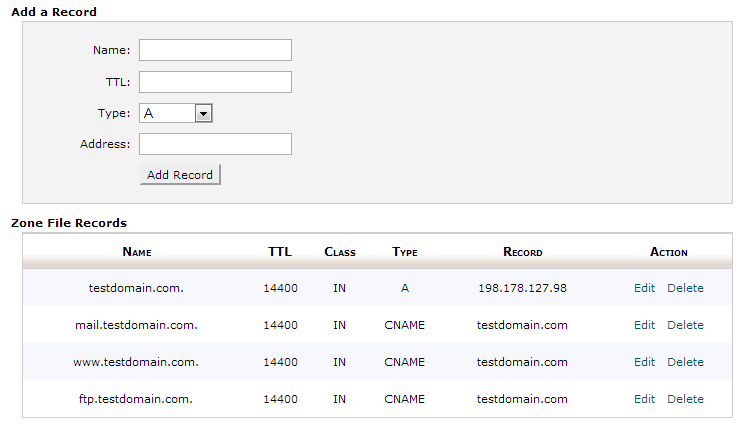
- Your Advanced Zone editor page may have more entries than the one depicted here. We've cleaned up the list for this article.
- You have two options now, you can point your entire domain to Squarespace (testdomain.com and www.testdomain.com) or we can point a subdomain to Squarespace.
Option 1: Domain pointing to Squarespace
Using your domain with Squarespace is easy, the only trick is that we have to modify MX records so that mail will continue to work. Â We'll cover that in the next section.
- To configure your domain to work with Squarespace, click the Edit link next to your desired subdomain. Â In our example it is www.testdomain.com, you can use blog.yourdomain.com or anything really.
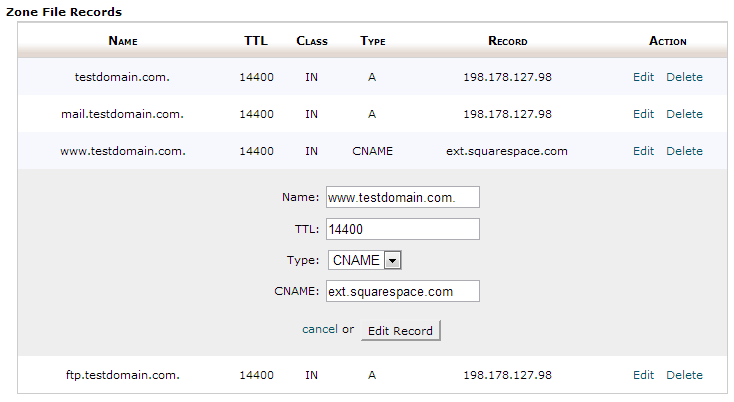
- you'll notice that the record is a CNAME record and the Squarespace domain name is in the box. Â The domain name to use is listed on the Squarespace documentation.
- Once you have the domain name entered, click Edit Record. Â This change will take effect immediately but may require up to 24 hours for the DNS change to propagate to your computer.
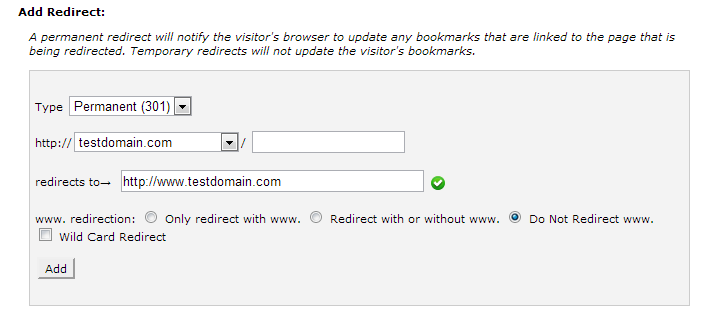
- Because you've changed where your www domain points, we'll need to set a Domain Redirect for the root domain, in our example testdomain.com. Â Click the Redirects option on the Domains menu in cPanel.

- Next, you want to add a Permanent Redirect, we don't want to redirect WWW or it will cause a loop.
Option 2: Subdomain pointing to Squarespace
The other option is to use a subdomain. Â This is much simpler to configure.Â
- Pull up the Advanced Zone Editor, this time we're going to add a zone.

- The TTL (Time to Live) should be fine at 14400, advanced users can set this to other lengths of time but 14400 is a good round number.
- The Name should be the desired name to use with Squarespace. Â Accessing your Squarespace page will be at this new url.
- The type should be CNAME and the Address should be ext.squarespace.com, again this is from the Squarespace Documentation.
- Click Add Record and you're done! Â Move on to the Squarespace Setup below.
MX Entry
If you chose to use your domain name and not a subdomain, you'll have to modify your MX Entry. You remember when we set mail.testdomain.com to be an A record? Now we have to set your MX to use mail.testdomain.com.
- Open the MX Entry Tool in cPanel
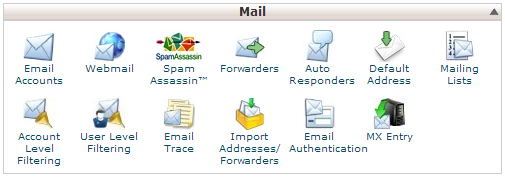
- Make sure Email Routing is set to Local or Automatically Detect

- Next, edit your existing MX, notice it is just testdomain.com, this will send mail to Tumblr, we can't have that.

- click Edit and enter mail.testdomain.com in the Destination box.

- Click Edit and you're done! Move on to the Squarespace Config below.
Squarespace Configration
Now that we've configured our DNS and MX if applicable, we can move on to the Squarespace configuration.
Login to your Squarespace account.
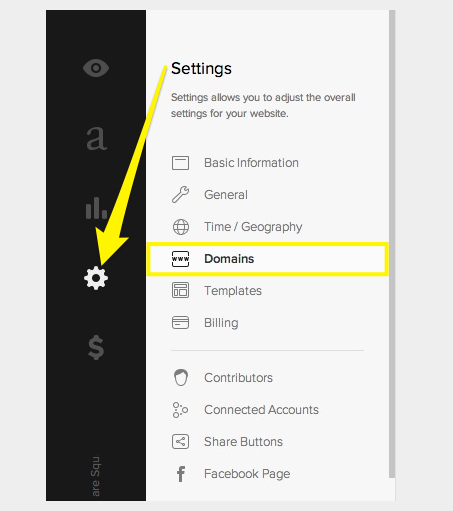
- Within the Site Manager, click Settings to access your Domains.
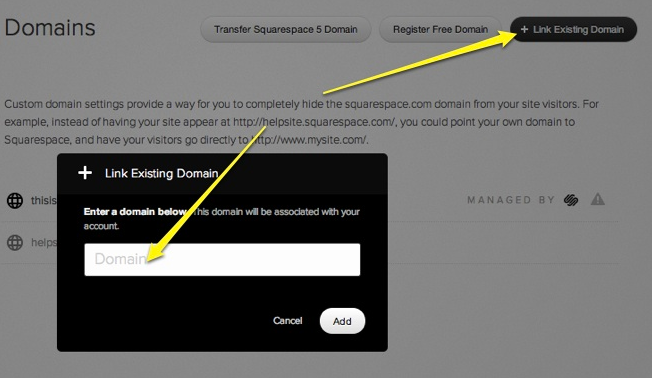
- Click the Link Existing Domain button to add your domain to your Squarespace site.
Please note that DNS changes can take up to 72 hours to propagate across the entire internet.


